This post brought to you in Markup! Kebe Says: Dan McD's blog

I wonder if this renders correctly?

I think it does.

I knew about the MD4C project for some time. I finally modified blahg to exploit MD4C so that I can create posts using markdown.

I haven't tested it all out yet, but I hope to soon. It's been a while (eesh, 3.5 years) since my last post, and no surprised, a lot has happened since then.

If I still have my half-dozen readers, hello again.

OmniOS Community Edition r151056 OmniOS Community Edition

OmniOSce v11 r151056 is out!

On the 3rd of November 2025, the OmniOSce Association has released a new stable version of OmniOS - The Open Source Enterprise Server OS. The release comes with many tool updates, brand-new features and additional hardware support. For details see the release notes.

Note that r151052 is now end-of-life. You should upgrade to r151054 or r151056 to stay on a supported track. r151054 is a long-term-supported (LTS) release with support until May 2028. Note that upgrading directly from r151052 to r151056 is not supported; you will need to update to r151054 along the way.

For anyone who tracks LTS releases, the previous LTS - r151046 - is now in its last six months. You should plan to upgrade to r151054 for continued LTS support.

OmniOS is fully Open Source and free. Nevertheless, it takes a lot of time and money to keep maintaining a full-blown operating system distribution. Our statistics show that there are almost 2’000 active installations of OmniOS while fewer than 20 people send regular contributions. If your organisation uses OmniOS based servers, please consider becoming a regular patron or taking out a support contract.


Any problems or questions, please get in touch.

Old Names and New Places Kebe Says: Dan McD's blog

So recently I acquired @danmcd on Twitter. It was a long time coming. I was relatively late in early-adopting twitter: late spring 2009. By then someone else had claimed the handle danmcd, to my chagrin.

I was chagrined (in 2009) because I’ve been danmcd at SOMEWHERE since 1988. First .edus, even a .gov and .mil, and of course a series of .coms including my own kebe.com

(Who and/or what is Kebe might be another blog post in and of itself. In the meantime, this answer will suffice:

Obi-Wan, “it’s me” )

Names are important. Especially in the virtual world, they establish not only presence, but often place as well. I ended up being @kebesays on twitter for a long time. Luckily, Twitter makes handle-swapping relatively easy, so anyone who was following @kebesays got moved over to @danmcd without issue. I still keep /* XXX KEBE SAYS … at the top, because if you see that in my code, it indicates work-in-progress issues; and aren’t we all works-in-progress?

Speaking of names and places: one name and one place that has been associated with Triton and SmartOS - Joyent - will no longer be associated with SmartOS or Triton. Samsung has decided to use other in-house technology for their future, and that work will continue with Joyent. SmartOS and Triton are being spun off to MNX Solutions, where I will be continuing SmartOS development. See the MNX Triton FAQ and my email for more.

Oh and yes, I’ll get to be ‘danmcd‘ at MNX as well.

Standalone SmartOS Gets Selectable PIs Kebe Says: Dan McD's blog

So what happened?

We’ve introduced a requested feature in SmartOS: the ability to select a platform image from loader(4), aka OS-8231.

To enable this feature, you must (using example bootable pool bootpool):

  • Update BOTH the boot bits and the Platform Image to this release. Normally piadm(1M) updates both, so please use either latest or another ISO-using installation.
  • Once booted to this PI, utter piadm activate 20210812T031946Z OR install another ISO-using installation (even if you never use it) to have the new piadm(1M) generate the /bootpool/boot/os/ directory the new modifications to loader require.

This represents a minor flag day because an older piadm(1M) will not update an existing /bootpool/boot/os/ directory. The PI-selection menus live in /bootpool/boot/os/, and will remain in an inconsistent state with older PIs using piadm(1M). It is safe to remove /bootpool/boot/os/ if you wish, as the activated (default) PI always boots correctly modulo actual /bootpool/boot/ corruption regardless.

So Tell Me about the Internals and the os/ Directory!

There were two SmartOS repositories that had changes. The first changeset was in illumos-joyent’s loader(5) Forth files. Alongside some additional support routines, the crux of the change is this addition to the main Joyent loader menu:

\
\ If available, load the "Platform Image Selection" option.
\
try-include /os/pi.rc

If the piadm(1M)-generated file /bootpool/os/pi.rc does not exist, the Joyent loader menu appears as it did prior to this fix.

The os/ Directory and illumos Needing platform/

The os/ directory in a bootable pool’s bootpool/boot filesystem contains directories of Platform Image stamps and the aforementioned pi.rc file.

[root@smartos-efi ~]# piadm list
PI STAMP               BOOTABLE FILESYSTEM            BOOT IMAGE NOW  NEXT 
20210715T010227Z       bootpool/boot                  available  no   no  
20210805T161859Z       bootpool/boot                  available  no   no  
20210812T031946Z       bootpool/boot                  next       yes  yes 
[root@smartos-efi ~]# ls /bootpool/boot/os
20210715T010227Z  20210805T161859Z  pi.rc
[root@smartos-efi ~]# 

Each PI stamp directory contains a single platform symbolic link up to the platform-STAMP directory that contains the PI.

[root@smartos-efi ~]# ls -lt /bootpool/boot/os/20210805T161859Z
total 1
lrwxrwxrwx   1 root     root          31 Aug 12 14:41 platform -> ../../platform-20210805T161859Z
[root@smartos-efi ~]#

The Triton Head Node loader menu has a pointer to the “prior Platform Image” has the explicit path of …/os/STAMP/platform contain the platform image. It was a design mistake of the original standalone SmartOS to not lay out platform image in this manner, but given that piadm(1M) must generate the pi.rc file anyway, it is not much more difficult to add symbolic-link construction as well.

The pi.rc File

The pi.rc file includes an additional menu item for the main Joyent loader screen:

Joyent Loader Screen

It also contains up to three pages of platform images to choose from. Here’s an example of page 1 of 3:

Joyent Loader Screen

The default PI is on every page, and up to five (5) additional PIs can appear per page. This means 16 PIs (default + 3 * 5) can be offered on a loader screen. Every time a platform image is activated, deleted, or added, the piadm(1M) command regenerates the entire os/ directory, including pi.rc.

So How and Why Do I Use This?

  • Temporarily revert to and older Platform Image may be useful to check for regressions or to isolate behavior to a specific release.
  • Developers can use *just* platform-image installations (platform-yyyymmddThhmmssZ.tgz to test their new builds without making the bootable pool unusable.

The piadm list output indicates being booted into a non-default PI by its NOW column:

PI STAMP               BOOTABLE FILESYSTEM            BOOT IMAGE NOW  NEXT 
20210114T041228Z       zones/boot                     available  no   no  
20210114T163038Z       zones/boot                     available  no   no  
20210211T055122Z       zones/boot                     none       no   no  
20210211T163919Z       zones/boot                     none       no   no  
20210224T232633Z       zones/boot                     available  no   no  
20210225T124034Z       zones/boot                     none       no   no  
20210226T213821Z       zones/boot                     none       no   no  
20210311T001742Z       zones/boot                     available  no   no  
20210325T002528Z       zones/boot                     available  no   no  
20210422T002312Z       zones/boot                     available  no   no  
20210520T001536Z       zones/boot                     available  no   no  
20210617T001230Z       zones/boot                     available  no   no  
20210701T204427Z       zones/boot                     available  no   no  
20210715T010227Z       zones/boot                     available  no   no  
20210729T002724Z       zones/boot                     available  no   no  
20210804T003855Z       zones/boot                     available  no   no  
20210805T161859Z       zones/boot                     available  yes  no  
20210812T031946Z       zones/boot                     next       no   yes 

In the above example, the SmartOS machine is booted into 20210805T161859Z, but its default is 20210812T031946Z. It would also look this way if piadm activate 20210812T031946Z was just invoked, as the semantics are the same.

MTV (originally 'MTV: Music Television') Turns 40 Kebe Says: Dan McD's blog

That I had to explain MTV's acronym... eeesh.

When Cable TV Was Still Young

Set the wayback machine 40 years plus 6-8 months ago (from the date of this post). Cable TV was rolling out in my suburb of Milwaukee, and it FINALLY arrived at our house. Hurray! We didn't have HBO, but we DID have all of the other fledgling basic cable channels... including Nickelodeon, which was then one of the Warner Amex Satellite Entertainment Company (WASEC) channels. (WASEC, and its progenitor Columbus, Ohio QUBE project, are its own fascinating story.) Nickelodeon mostly had single-digit-aged kids programming, but at night (especially Sunday night) it had a 30-minute show called PopClips, which would play the then mindblowing concept of music videos... or as one friend of mine called them, "Intermissions" (because HBO would play music videos between movies to synch up start times... I didn't have HBO so I trusted him). There is a YouTube narrative video that discusses the show in depth, including its tenuous link to another WASEC channel that was going to start airing 40 years ago today...

I Want My MTV

Anyone sufficiently old knows that MTV stood for Music Television. At midnight US/Eastern time on August 1, 1981, it played its space-program-themed bumper, followed by, "Video Killed the Radio Star" by The Buggles.

Now the local cable company pulled a bit of a dick move with MTV for us. It attached it to HBO. If you didn't have HBO, the cable company scrambled MTV, albeit not as strongly as they did with HBO. They scrambled it by making the picture black-and-white, and cutting out the sound completely. LUCKILY for me, we did have "cable radio" which let us not only get better FM reception, but also the stereo broadcast for MTV. Combine them, and I got to see black-and-white videos with proper sound.

Thanks to people's old videotapes and YouTube, you can watch (modulo a couple of copyright-whiners) the first two hours of MTV here. I'd have embedded this, but I'm guessing the copyright-whiners won that battle too.

There's a lot to unpack about MTV being 40. I'm not going to try too hard in this post, but there are some things that must be acknowledged:

  • MTV was a generation-defining phenomenon for Generation X. I suppose late-wave Boomers (the last of whom were graduating high school or already in college) could make a claim to ownership of MTV's first audience, but as MTV matured, it was very much initially for us Xers.
  • It was initially narrowly focussed. The only Black people you'd see on MTV initially were JJ Jackson or members of The Specials. That changed a couple of years later, however.
  • It spawned at least one knock-off: Friday Night Videos, which unlike MTV didn't require Cable.

Of course MTV doesn't play music videos on it anymore, we have alternatives now: YouTube, DailyMotion, and their ilk. And if you miss your MTV, or want to know what it looked like, you really don't have to look hard; many people have uploaded at least some VHS rips, many alas without music thanks to copyright teardowns. But with artist often putting out their old music on their own YouTube pages, some have taken to curating lists of them. Even NPR has curated the first 100 songs!

All Your Base Are Belong to 20-Somethings, and Solaris 9 Kebe Says: Dan McD's blog

Two Decades Ago…

Someone pointed out recently that the famous Internet meme “All your base are belong to us” turned 20 this week. Boy do I feel old. I was still in California, but Wendy and I were plotting our move to Massachusetts.

In AD 2001, S9 Was Beginning

OF COURSE I watched the video back then. The original Shockwave/Flash version on a site that no longer exists. I used my then-prototype Sun Blade 1000 to watch it, on Netscape, on in-development Solaris 9.

I found a bug in the audio driver by watching it. Luckily for me, portions of the Sun bug database were archived and available for your browsing pleasure. Behold bug 4451857. I reported it, and all of the text there is younger me.

The analysis and solution are not in this version of the bug report, which is a shame, because the maintainer (one Brian Botton) was quite responsive, and appreciated the MDB output. He fixed the bug by moving around a not-shown-there am_exit_task() call.

Another thing missing from the bug report is my “Public Summary” which I thought would tie things up nicely. I now present it here:

In A.D. 2001
S9 was beginning.
Brian: What Happen?
Dan: Someone set up us the livelock
Dan: We get signal
Brian: What!
Dan: MDB screen turn on.
Brian: It’s YOU!
4451857: How are you gentleman?
4451857: All your cv_wait() are belong to us.
4451857: You are on the way to livelock.
Brian: What you say?
4451857: You have no chance to kill -9 make your time.
4451857: HA HA HA HA…
Brian: Take off every am_exit_task().
Dan: You know what you doing
Brian: Move am_exit_task().
Brian: For great bugfix!

Goodbye 2020 Kebe Says: Dan McD's blog

Pardon my latency

Well, at least I’m staying on track for single-digit blog posts in a year. :)

Okay, seriously, 2020’s pandemic-and-other-chaos tends to distract. Also, I did actually have a few things worth my attention.

RFD 176

The second half of 2020 at work has been primarily about RFD 176 – weaning SmartOS and Triton off of the requirement for a USB key. Phases I (standalone SmartOS) and II (Triton Compute Node) are finished. Phase III (Triton Head Node) is coming along nicely, thanks to real-world testing on Equinix Metal (nee Packet), and I hope to have a dedicated blog post about our work in this space coming in the first quarter 2021.

Follow our progress in the rfd176 branches of smartos-live and sdc-headnode.

Twins & College

My twins are US High School seniors, meaning they’re off to college/university next fall, modulo pandemic-and-other-chaos. This means applications, a little stress, and generally folding in pandemic-and-other-chaos issues into the normal flow of things as well. Out of respect for their privacy and autonomy, I’ll stop here to avoid details each of them can spill on their own terms.

On 2021

Both “distractions” mentioned above will continue into 2021, so I apologize in advance for any lack of content here for my half-dozen readers. You can follow me on any of the socials mentioned on the right, because I’ll post there if the spirit moves me (especially on issues of the moment).

A Request to Security Researchers from illumos Kebe Says: Dan McD's blog

A Gentle Reminder About illumos

A very bad security vulnerability in Solaris was patched-and-announced by Oracle earlier this week. Turns out, we in open-source-descendant illumos had something in the same neighborhood. We can’t confirm it’s the same bug because reverse-engineering Oracle Solaris is off the table.

In general if a vulnerability is an old one in Solaris, there’s a good chance it’s also in illumos. Alex Wilson said it best in this recent tweet:

If you want to see the full history, the first 11 minutes of my talk from 2016’s FOSDEM contains WHY a sufficiently old vulnerability in Solaris 10 and even Solaris 11 may also be in illumos.

Remember folks, Solaris is closed-source under Oracle, even though it used to be open-source during the last years of Sun’s existence. illumos is open-source, related, but NOT the same as Solaris anymore. Another suggested talk covers this rather well, especially if you start at the right part.

The Actual Request

Because of this history and shared heritage, if you’re a security researcher, PLEASE make sure you find one of many illumos distributions, install it, and try your proof-of-concept on that as well. If you find the same vulnerability in illumos, please report it to us via the security@illumos.org mailing alias. We have a PGP key too!

Thank you, and please test your Solaris exploits on illumos too (and vice-versa).

Now you can boot SmartOS off of a ZFS pool Kebe Says: Dan McD's blog

Booting from a zpool

The most recent published biweekly release of SmartOS has a new feature I authored: the ability to manage and boot SmartOS-bootable ZFS pools.

A few people read about this feature, and jumped to the conclusion that the SmartOS boot philosophy, enumerated here:

  • The "/" filesystem is on a ramdisk
  • The "/usr" filesystem is read-only
  • All of the useful state is stored on the zones ZFS pool.

were suddenly thrown out the window. Nope.

This change is the first phase in a plan to not depend on ISO images or USB sticks for SmartOS, or Triton, to boot.

The primary thrust of this specific SmartOS change was to allow installation-time enabling of a bootable zones pool. The SmartOS installer now allows one to specify a bootable pool, either one created during the "create my special pools" shell escape, or just by specifying zones.

A secondary thrust of this change was to allow running SmartOS deployments to upgrade their zones pools to be BIOS bootable (if the pool structure allows booting), OR to create a new pool with new devices (and use zpool create -B) to be dedicated to boot. For example:

smartos# zpool create -f -B standalone c3t0d0
smartos# piadm bootable -e standalone
smartos# piadm bootable
standalone                     ==> BIOS and UEFI
zones                          ==> non-bootable
smartos# 

Under the covers

(NOTE: Edited 3 May 2023 to change "1M" man page refs to "8".)

Most of what’s above can be gleaned from the manual page. This section will discuss what the layout of a bootable pool actually looks like, and how the piadm(8) command sets things up, and expects things to BE set up.

Bootable pool basics

The piadm bootable command will indicate if a pool is bootable at all via the setting of the bootfs property on the pool. That gets you the BIOS bootability check, which admittedly is an assumption. The UEFI check happens by finding the disks s0 slice, and seeing if it’s formatted as pcfs, and if the proper EFI System Partition boot file is present.

bootfs layout

For standalone SmartOS booting, bootfs is supposed to be mounted on "/" with the pathname equal to the bootfs name. By convention, we prefer POOL/boot. Let’s take a look:


smartos# piadm bootable zones ==> BIOS and UEFI smartos# piadm list PI STAMP BOOTABLE FILESYSTEM BOOT BITS? NOW NEXT 20200810T185749Z zones/boot none yes yes 20200813T030805Z zones/boot next no no smartos# cd /zones/boot smartos# ls -lt total 9 lrwxrwxrwx 1 root root 27 Aug 25 15:58 platform -> ./platform-20200810T185749Z lrwxrwxrwx 1 root root 23 Aug 25 15:58 boot -> ./boot-20200813T030805Z drwxr-xr-x 3 root root 3 Aug 14 16:10 etc drwxr-xr-x 4 root root 15 Aug 13 06:07 boot-20200813T030805Z drwxr-xr-x 4 root root 5 Aug 13 06:07 platform-20200813T030805Z drwxr-xr-x 4 1345 staff 5 Aug 10 20:30 platform-20200810T185749Z smartos#

Notice that the Platform Image stamp 20200810T185749Z is currently booted, and will be booted the next time. Notice, however, that there are no “BOOT BITS”, also known as the Boot Image, for 20200810T185749Z, and instead the 20200813T030805Z boot bits are employed? This allows a SmartOS bootable pool to update just the Platform Image (ala Triton) without altering loader. If one utters piadm activate 20200813T030805Z, then things will change:

smartos# piadm activate 20200813T030805Z
smartos# piadm list
PI STAMP           BOOTABLE FILESYSTEM            BOOT BITS?   NOW   NEXT  
20200810T185749Z   zones/boot                     none         yes   no   
20200813T030805Z   zones/boot                     next         no    yes  
smartos# ls -lt
total 9
lrwxrwxrwx   1 root     root          27 Sep  2 00:25 platform -> ./platform-20200813T030805Z
lrwxrwxrwx   1 root     root          23 Sep  2 00:25 boot -> ./boot-20200813T030805Z
drwxr-xr-x   3 root     root           3 Aug 14 16:10 etc
drwxr-xr-x   4 root     root          15 Aug 13 06:07 boot-20200813T030805Z
drwxr-xr-x   4 root     root           5 Aug 13 06:07 platform-20200813T030805Z
drwxr-xr-x   4 1345     staff          5 Aug 10 20:30 platform-20200810T185749Z
smartos# 

piadm(8) manipulates symbolic links in the boot filesystem to set versions of both the Boot Image (i.e. loader) and the Platform Image.

Home Data Center 3.0 -- Part 2: HDC's many uses Kebe Says: Dan McD's blog

In the prior post, I mentioned a need for four active ethernet ports. These four ports are physical links to four distinct Ethernet networks. Joyent's SmartOS and Triton characterize these with NIC Tags. I just view them as distinct networks. They are all driven by the illumos igb(7d) driver (hmm, that man page needs updating) on HDC 3.0, and I'll specify them now:

  • igb0 - My home network.
  • igb1 - The external network. This port is directly attached to my FiOS Optical Network Terminal's Gigabit Ethernet port.
  • igb2 - My work network. Used for my workstation, and "external" NIC Tag for my work-at-home Triton deployment, Kebecloud.
  • igb3 - Mostly unused for now, but connected to Kebecloud's "admin" NIC Tag.
The zones abstraction in illumos allows not just containment, but a full TCP/IP stack to be assigned to each zone. This makes a zone feel more like a proper virtual machine in most cases. Many illumos distros are able to run a full VMM as the only process in a zone, which ends up delivering a proper virtual machine. As of this post's publication, however, I'm only running illumos zones, not full VM ones. Here's their list:
(0)# zoneadm list -cv
  ID NAME             STATUS     PATH                           BRAND    IP    
   0 global           running    /                              ipkg     shared
   1 webserver        running    /zones/webserver               lipkg    excl  
   2 work             running    /zones/work                    lipkg    excl  
   3 router           running    /zones/router                  lipkg    excl  
   4 calendar         running    /zones/calendar                lipkg    excl  
   5 dns              running    /zones/dns                     lipkg    excl  
(0)# 
Their zone names correspond to their jobs:
  • global - The illumos global zone is what exists even in the absence of other zones. Some illumos distros, like SmartOS, encourage minimizing what a global zone has for services. HDC's global zone serves NFS and SMB/CIFS to my home network. The global zone has the primary link into the home network. HDC's global zone has no default route, so if any operations that need out-of-the-house networking either go through another zone (e.g. DNS lookups), or a defaut route must be temporarily added (e.g. NTP chimes, `pkg update`).
  • webserver - Just like the name says, this zone hosts the web server for kebe.com. For this zone, it uses lofs(7FS), the loopback virtual file system to inherit subdirectories from the global zone. I edit blog entries (like this one) for this zone via NFS from my laptop. The global zone serves NFS, but the files I'm editing are not only available in the global zone, but are also lofs-mounted into the webserver zone as well. The webserver zone has a vnic (see here for details about a vnic, the virtual network interface controller) link to the home network, but has a default route, and the router zone's NAT (more later) forwards ports 80 and 443 to this zone. Additionally, the home network DHCP server lives here, for no other reason than, "it's not the global zone."
  • work - The work zone is new in the past six years, and as of recently, eschews lofs(7FS) for delegated ZFS datasets. A delegated ZFS dataset, a proper filesystem in this case, is assigned entirely to the zone. This zone also has the primary (and only) link to the work network, a physical connection (for now unused) to my work Triton's admin network, and an etherstub vnic (see here for details about an etherstub) link to the router zone. The work zone itself is a router for work network machines (as well as serves DNS for the work network), but since I only have one public IP address, I use the etherstub to link it to the router zone. The zone, as of recent illumos builds, can further serve its own NFS. This allows even less global-zone participation with work data, and it means work machines do not need backchannel paths to the global zone for NFS service. The work zone has a full illumos development environment on it, and performs builds of illumos rather quickly. It also has its own Unbound (see the DNS zone below) for the work network.
  • router - The router zone does what the name says. It has a vnic link to the home network and the physical link to the external network. It runs ipnat to NAT etherstub work traffic or home network traffic to the Internet, and redirects well-known ports to their respective zones. It does not use a proper firewall, but has IPsec policy in place to drop anything that isn't matched by ipnat, because in a no-policy situation, ipnat lets unmatched packets arrive on the local zone. The router zone also runs the (alas still closed source) IKEv1 daemon to allow me remote access to this server while I'm remote. It uses an old test tool from the pre-Oracle Sun days a few of you half-dozen readers will know by name. We have a larval IKEv2 out in the community, and I'll gladly switch to that once it's available.
  • calendar - Blogged about when first deployed, this zone's sole purpose is to serve our calendar both internally and externally. It uses the Radicale server. Many of my complaints from the prior post have been alleviated by subsequent updates. I wish the authors understood interface stability a bit better (jumping from 2.x to 3.0 was far more annoying than it needed to be), but it gets the job done. It has a vnic link to the home network, a default route, and gets calendaring packets shuffled to it by the router zone so my family can access the calendar wherever we are.
  • dns - A recent switch to OmniOSce-supported NSD and Unbound encouraged me to bring up a dedicated zone for DNS. I run both daemons here, and have the router zone redirect public kebe.com requests here to NSD. The Unbound server services all networks that can reach HDC. It has a vnic link to the home network, and a default route.

The first picture shows HDC as a single entity, and its physical networks. The second picture shows the zones of HDC as Virtual Network Machines, which should give some insight into why I call my home server a Home Data Center.

HDC, physically HDC, logically

Home Data Center 3.0 -- Part 1: Back to AMD Kebe Says: Dan McD's blog

Twelve years ago I built my first Home Data Center (HDC). Six years ago I had OmniTI's Supermicro rep put together the second one.

Unlike last time, I'm not going to recap the entirety of HDC 2.0. I will mention briefly that since its 2014 inception, I've only upgraded its mirrored spinning-rust disk drives twice: once from 2TB to 6TB, and last year from 6TB to 14TB. I'll detail the current drives in the parts list.

Like last time, and the time before it, I started with a CPU in mind. AMD has been on a tear with Ryzen and EPYC. I still wanted low-ish power, but since I use some of HDC's resources for work or the illumos community, I figured a core-count bump would be worth the cost of some watts. Lucky me, the AMD Ryzen 7 3700x fit the bill nicely: Double the cores & threads with a 20W TDP increase.

Unlike last time, but like the time before it, I built this one from parts myself. It took a little digging, and I made one small mistake in parts selection, but otherwise it all came together nicely.

Parts

  • AMD Ryzen 7 3700x - It supports up to 128GB of ECC RAM, it's double the CPU of the old HDC for only 50% more TDP wattage. It's another good upgrade.
  • Noctua NH-U12S (AM4 edition) CPU cooler - I was afraid the stock cooler would cover the RAM slots on the motherboard. Research suggested the NH-U12S would prevent this problem, and the research panned out. Also Noctua's support email, in spite of COVID, has been quite responsive.
  • ASRock Rack X470D4U - While only having two Gigabit Ethernet (GigE) ports, this motherboard was the only purpose-built Socket AM4 server motherboard. It has IPMI/BMC on its own Ethernet port (but you'll have to double check it doesn't "failover" to your first GigE port). It has four DIMM slots, and with the current BIOS (mine shipped with it), supports 128GB of RAM. There are variants with Two 10 Gigabit Ethernet (10GigE) ports, but I opted for the less expensive GigE one. If I'd wanted to wait, there's a new, not yet available, X570 version, whose more expensive version has both two 10GigE AND two GigE ports, which would saved me from needing...
  • Intel I350 dual-port Gigabit Ethernet card - This old reliable is well supported and tested. It brings me up to the four ethernet ports I need.
  • Nemix RAM - 4x32GB PC3200 ECC Unbuffered DIMMS - Yep, like HDC 2.0, I maxxed out my RAM immediately. 6 years ago I'd said 32GB would be enough, and for the most part that's still true, except I sometimes wish to perform multiple concurrent builds, or memory-map large kernel dumps for debugging. The vendor is new-to-me, and did not have a lot of reviews on Newegg. I ran 2.5 passes of memtest86 against the memory, and it held up under those tests. Nightly builds aren't introducing bitflips, which I saw on HDC 1.0 when it ran mixed ECC/non-ECC RAM.
  • A pair of 500GB Samsung 860 EVO SATA SSDs - These are slightly used, but they are mirrored, and partitioned as follows:
    • s0 -- 256MB, EFI System partiontion (ESP)
    • s1 -- 100GB, rpool for OmniOSce
    • s2 -- 64GB, ZFS intent log device (slog)
    • s3 -- 64GB, unused, possible future L2ARC
    • s4 -- 2GB, unused
    • The remaining 200-something GB is unassigned, and fodder for the wear-levellers. The motherboard HAS a pair of M.2 connectors for NVMe or SATA SSDs in that form-factor, but these were hand-me-downs, so free.
  • A pair of Western Digital Ultrastar (nee HGST Ultrastar) HC530 14TB Hard Drives - These are beasts, and according to Backblaze stats released less than a week ago, its 12TB siblings hold up very well with respect to failure rates.
  • Fractal Design Meshify C case - I'd mentioned a small mistake, and this case was it. NOT because the case is bad... the case is quite good, but because I bought the case thinking I needed to optimize for the microATX form factor, and I really didn't need to. The price I paid for this was the inability to ever expand to four 3.5" drives if I so desire. In 12 years of HDC, though, I've never exceeded that. That's why this is only a small mistake. The airflow on this case is amazing, and there's room for more fans if I ever need them.
  • Seasonic Focus GX-550 power supply - In HDC 1.0, I had to burn through two power supplies. This one has a 10 year warranty, so I don't think I'll have to stress about it.
  • OmniOSce stable releases - Starting with HDC 2.0, I've been running OmniOS, and its community-driven successor, OmniOSce. The every-six-month stable releases strike a good balance between refreshes and stability.

I've given two talks on how I use HDC. Since the last of those was six years ago, I'm going to stop now, and dedicate the next post to how I use HDC 3.0.

Now self-hosted at kebe.com Kebe Says: Dan McD's blog

Let's throw out the first pitch.

I've moved my blog over from blogspot to here at kebe.com. I've recently upgraded the hardware for my Home Data Center (the subject of a future post), and while running the Blahg software doesn't require ANY sort of hardware upgrade, I figured since I had the patient open I'd make the change now.

Yes it's been almost five years since last I blogged. Let's see, since the release of OmniOS r151016, I've:

  • Cut r151018, r151020, and r151022.
  • Got RIFfed from OmniTI.
  • Watched OmniOS become OmniOSce with great success.
  • Got hired at Joyent and made more contributions to illumos via SmartOS.
  • Tons more I either wouldn't blog about, or just plain forgot to mention.
So I'm here now, and maybe I'll pick up again? The most prolific year I had blogging was 2007 with 11 posts, with 2011 being 2nd place with 10. Not even sure if I *HAVE* a half-dozen readers anymore, but now I have far more control over the platform (and the truly wonderful software I'm using).

While Blahg supports comments, I've disabled them for now. I might re-enabled them down the road, but for now, you can find me on one of the two socials on the right and comment there.

Goodbye blogspot Kebe Says: Dan McD's blog

First off, long time no blog!

This is the last post I'm putting on the Blogspot site. In the spirit of eating my own dogfood, I've now set up a self-hosted blog on my HDC. I'm sure it won't be hard for all half-dozen of you readers to move over. I'll have new content over there, at the very least the Hello, World post, a catchup post, and a HDC 3.0 post to match the ones for 1.0 and 2.0.

Coming Soon (updated) Kebe Says: Dan McD's blog

This is STILL only a test, but with an update. The big question remains: How quickly I can bring over my old Google owned blog entries?

(BTW Jeff, I could get used to this LaTeX-like syntax…)

You’ll start to see stuff trickle in. I’m using the hopefully-pushed-back-soon enhancements to Blahg that allows simple raw HTML for entries. I’ve done some crazy thing to extract, and maybe the hello-world post here will explain that.

From 0-to-illumos on OmniOS r151016 Kebe Says: Dan McD's blog

Today we updated OmniOS to its next stable release: r151016. You can click the link to see its release notes, and you may notice a brief mention the illumos-tools package.

I want to see more people working on illumos. A way to help that is to get people started on actually BUILDING illumos more quickly. To that end, r151016 contains everything to bring up an illumos development environment. You can develop small on it, but this post is going to discuss how we make building all of illumos-gate from scratch easier. (I plan on updating the older post on small/focused compilation after ws(1) and bldenv(1) effectively merge into one tool.)

The first thing you want to do is install OmniOS. The latest release media can be found here, on the Installation page.

After installation, your system is a blank slate. You'll need to set a root password, create a non-root user, and finally add networking parameters. The OmniOS wiki's General Administration Guide covers how to do this.

I've added a new building illumos page to the OmniOS wiki that should detail how straightforward the process is. You should be able to kick off a full nightly(1ONBLD) build quickly enough. If you don't want to edit one of the omnios-illumos-* samples in /opt/onbld/env, just make sure you have a $USER/ws directory, clone one of illumos-gate or illumos-omnios into $USER/ws/testws and use one of the template /opt/onbld/env/omnios-illumos-* files corresponding to illumos-gate or illumos-omnios. For example:


omnios(~)[0]% mkdir ws
omnios(~)[0]% cd ws
omnios(~/ws)[0]% git clone https://github.com/illumos/illumos-gate/ testws

omnios(~/ws)[0]% /bin/time /opt/onbld/bin/nightly /opt/onbld/env/omnios-illumos-gate
You can then look in testws/log/log-date&time/mail_msg to see how your build went.

Quick Reminder -- tcp_{xmit,recv}_hiwat and high-bandwidth*delay networks Kebe Says: Dan McD's blog

I was recently working with a colleague on connecting two data centers via an IPsec tunnel. He was using iperf (coming soon to OmniOS bloody along with netperf) to test the bandwidth, and was disappointed in his results.

The amount of memory you need to hold a TCP connection's unacknowledged data is the Bandwidth-Delay product. The defaults shipped in illumos are small on the receive side:


bloody(~)[0]% ndd -get /dev/tcp tcp_recv_hiwat
128000
bloody(~)[0]%
and even smaller on the transmit side:

bloody(~)[0]% ndd -get /dev/tcp tcp_xmit_hiwat
49152
bloody(~)[0]%

Even platforms with Automatic tuning, the maximums they use are often not set highly enough.

Introducing IPsec into the picture adds additional latency (if not so much for encryption thanks to AES-NI & friends, then for the encapsulation and checks). This often is enough to take what are normally good enough maximums and invalidate them as too small. To change these on illumos, you can use the ndd(1M) command shown above, OR you can use the modern, persists-across-reboots, ipadm(1M) command:


bloody(~)[1]% sudo ipadm set-prop -p recv_buf=1048576 tcp
bloody(~)[0]% sudo ipadm set-prop -p send_buf=1048576 tcp
bloody(~)[0]% ipadm show-prop -p send_buf tcp
PROTO PROPERTY PERM CURRENT PERSISTENT DEFAULT POSSIBLE
tcp send_buf rw 1048576 1048576 49152 4096-1048576
bloody(~)[0]% ipadm show-prop -p recv_buf tcp
PROTO PROPERTY PERM CURRENT PERSISTENT DEFAULT POSSIBLE
tcp recv_buf rw 1048576 1048576 128000 2048-1048576
bloody(~)[0]%

There's future work there in not only increasing the upper bound (easy), but also adopting the automatic tuning so the maximum just isn't taken right off the bat.

New HDC service: Calendaring (or, The Limitation Game) Kebe Says: Dan McD's blog

I'll start by stating my biases: I don't like data bloat like ASN.1, XML, or even bloaty protocols like HTTP. (Your homework: Would a 1980s-developed WAN-scale RPC have obviated HTTP? Write a paper with your answer to that question, with support.) I understand the big problems they attempt to solve. I also still think not enough people in the business were paying attention in OS (or Networking) class when seeing the various attempts at data representation during the 80s and 90s. Also, I generally like pushing intelligence out to the end-nodes, and in client/server models, this means the clients. CalDAV rubs me the wrong way on the first bias, and MOSTLY the right way on my second bias, though the clients I use aren't very smart. I will admit near-complete ignorance of CalDAV. I poked a little at its RFC, looking up how Alarms are implemented, and discovered that mostly, Alarm processing is a client issue. ("This specification makes no attempt to provide multi-user alarms on group calendars or to find out for whom an alarm is intended.")

I've configured Radicale on my Home Data Center. I need to publicly thank Lauri Tirkkonen (aka. lotheac on Freenode) for the IPS publisher which serves me up Radicale. Since my target audience is my family-of-four, I wasn't particularly concerned with its reported lack of scalability. I also didn't want to have CalDAV be a supplicant of Apache or another web server for the time. If I decide to revisit my web server choices, I may move CalDAV to that new webserver (likely nginx). I got TLS and four users configured on stock Radicale.

My job was to make an electronic equivalent of our family paper calendar. We have seven (7) colors/categories for this calendar (names withheld from the search engines): Whole-Family, Parent1, Parent2, Both-Parents, Child1, Child2, Both-Children. I thought, given iCal (10.6), Calendar.app (10.10), or Calendar (iOS), it wouldn't be too hard for these to be created and shared. I was mildly wrong.

I'm not sure if what I had to do was a limitation of my clients, of Radicale, or of CalDAV itself, but I had to create seven (7) different accounts, each with a distinct ends-in-'/' URL:

  • https://.../Whole-Family.ics/
  • https://.../Parent1.ics/
  • https://.../Parent2.ics/
  • https://.../Both-Parents.ics/
  • https://.../Child1.ics/
  • https://.../Child2.ics/
  • https://.../Both-Children.ics/
I had to configure N (large N) devices or machine-logins with these seven (7) accounts. Luckily, Radicale DID allow me to restrict Child1's and Child2's write access to just their own calendars. Apart from that, we want the whole family to read all of the calendars. This means the colors are uniform across all of our devices (stored on the server). It also means any alarms (per above) trigger on ALL of our devices. This makes alarms (something I really like in my own Calendar) useless. Modulo the alarms problem (which can be mitigated by judicious use of iOS's Reminders app and a daily glance at the calendar), this seems to end up working pretty well, so far.

Both children recently acquired iPhones. Which means if I open this service outside our internal home network, we can schedule calendars no matter where we are, and get up to date changes no matter where we are. That will be extremely convenient.

I somewhat hope that one of my half-dozen readers will find something so laughably wrong with how I configured things that any complaints I make will be rendered moot. I'm not certain, however, that will be the case.

Systems Software in the Large Oxide Computer Company Blog

Software is hard (yes, even in an era of vibe coding), and systems software — the silent engine room of modern infrastructure — is especially so. By design, systems software provides an abstraction for programs, insulating programmers from the filthy details that lie beneath; piercing that abstraction to implement the underlying system is to embrace those details and their gnarly implications. Moreover, the expectation for systems software is (rightly) perfection; a system that is merely functional can be deceptively distant from the robustness required of foundational software. Systems software isn’t the only kind of hard software, of course, and indeed software can be difficult just by nature of its scope and composition: it is hard to build software that is just…​ big. Software that consists of many different modules and components built by multiple people over an extended period of time is known as programming in the large, and its difficulties extend beyond the mere implementation challenges of systems software.

Because the difficulties with developing systems software are broadly orthogonal to those of programming in the large, intersecting these two challenges — that is, developing systems software in the large — is to take on the most grueling of projects: it is the stuff of which mythical man months are literally made. Why would anyone ever develop such a system? Because they are often necessary to tackle software’s equivalents of the wicked problem: problems that are not only never completely solved, but also not even really understood until implementation is well underway. There are not pat answers for developing these systems — nor, infamously, silver bullets — they’re just…​ brutal.

This is on my mind because of a talk that we had at OxCon last week. OxCon is our affectionate name for the annual Oxide meetup here in Emeryville, and it’s a highlight of the year for everyone at Oxide. This year more than lived up to our high expectations, replete with cameos from the extraordinary IBM 26 Interpreting Card Punch and the Oakland Ballers. At OxCon we like to both reflect back and look forward, so in that spirit, we asked Oxide engineer Dave Pacheco if he might be willing to present on the project he’s been leading the charge on for the past two years: software update.

When we shipped the first Oxide rack two years ago, it had the minimum functionality necessary to update all its software in the field. Our priority was to make this update mechanism robust over all else, and we succeeded in the sense that it is indeed robust — but the experience is not yet the seamless, self-service facility that we have envisioned. Software update for the Oxide rack is exactly the kind of wicked problem that necessitates systems software in the large: it is not merely dynamically overhauling a distributed system, but doing so while remaining operable in the liminal state between the old software and the new. Compounding this was the urgency we felt: delivering self-service update is essential to realize our vision of the cloud experience on premises, and our customers needed it as soon as we could deliver it. As if this weren’t enough, the Oxide update problem has an acute constraint not faced by the public clouds: we need to be able to deliver updates across an air gap — we cannot rely on the public cloud’s hidden crutch of operators and runbooks. It is a problem so wicked, you can practically hear it cackle.

Despite the thorniness of the problem, Dave and team had managed to achieve the ambitious milestones that they had set for themselves at OxCon last year, and I was naturally excited for his presentation this year. That said, I wasn’t ready for what was coming: Dave not only described the tremendous work on software update (delving into both the multi-year history of the project and the significant progress since the last OxCon), but also reflected on leading the software update project itself. The result was an absolutely extraordinary talk, not just on the mechanics of software essential to Oxide, but on the unique challenges of systems software in the large.

Dave’s talk dripped with hard-won wisdom, running the gamut from maintaining focus (and the looming specter of what Dave calls "organizational procrastination") to fighting scope creep and the mechanics of specific technical decisions. We felt Dave’s talk to be too good to be kept to ourselves — and thanks to our transparency, nothing in it needs to be secret; we are thrilled to be able to make it generally available:

This talk is a must watch for anyone doing systems software in the large, containing within it the kind of lessons that are often only learned the hard way. While we think it’s valuable for everyone, should you be the kind of sicko inexplicably drawn to exactly the kind of nasty problems that Dave describes, consider joining us — there is more systems software in the large to be done at Oxide!

vfio-user client in QEMU 10.1 Staring at the C

The recent release of QEMU 10.1 now comes with its very own vfio-user client. You can try this out yourself relatively easily - please give it a go!1

vfio-user is a framework that allows implementing PCI devices in userspace. Clients (such as QEMU) talk the vfio-user protocol over a UNIX socket to a device server; it looks something like this:

vfio-user architecture

To implement a virtual device for a guest VM, there are generally two parts required: “frontend” driver code in the guest VM, and a “backend” device implementation.

The driver is usually - but by no means always - implemented in the guest OS kernel, and can be the same driver real hardware uses (such as a SATA controller), or something special for a virtualized platform (such as virtio-blk).

The job of the backend device implementation is to emulate the device in various ways: respond to register accesses, handle mappings, inject interrupts, and so on.

An alternative to virtual devices are so-called “passthrough” devices, which provide a thin virtualization layer on top of a real physical device, such as an SR-IOV Virtual Function from a physical NIC. For PCI devices, these are typically handled via the VFIO framework.

Other backend implementations can live in all sorts of different places: the host kernel, the emulator process, a hardware device, and so on.

For various reasons, we might want a userspace software device implementation, but not as part of the VMM process (such as QEMU) itself.

The rationale

For virtio-based devices, such “out of process device emulation” is usually done via vhost-user. This allows a device implementation to exist in a separate process, shuttling the necessary messages, file descriptors, and shared mappings between QEMU and the server.

However, this protocol is specific to virtio devices such as virtio-net and so on. What if we wanted a more generic device implementation framework? This is what vfio-user is for.

It is explicitly modelled on the vfio interface used for communication between QEMU and the Linux kernel vfio driver, but it has no kernel component: it’s all done in userspace. One way to think of vfio-user is that it smushes vhost-user and vfio together.

In the diagram above, we would expect much of the device setup and management to happen via vfio-user messages on the UNIX socket connecting the client to the server SPDK process: this part of the system is often referred to as the “control plane”. Once a device is set up, it is ready to handle I/O requests - the “data plane”. For performance reasons, this is often done via sharing device memory with the VM, and/or guest memory with the device. Both vhost-user and vfio-user support this kind of sharing, by passing file descriptors to mmap() across the UNIX socket.

libvfio-user

While it’s entirely possible to implement a vfio-user server from scratch, we have implemented a C library to make this easier: this handles the basics of implementing a typical PCI device, allowing device implementers to focus on the specifics of the emulation.

SPDK

At Nutanix, one of the main reasons we were interested in building all this was to implement virtual storage using the NVMe protocol. To do this we make use of SPDK. SPDK’s NVMe support was originally designed for use in a storage server context (NVMe over Fabrics). As it happens, there are lots of similarities between such a server, and how an NVMe PCI controller needs to work internally.

By re-using this nvmf subsystem in SPDK, alongside libvfio-user, we can emulate a high-performance virtualized NVMe controller for use by a VM. From the guest VM’s operating system, it looks just like a “real” NVMe card, but on the host, it’s using the vfio-user protocol along with memory sharing, ioeventfds, irqfds, etc. to talk to an SPDK server.

The Credits

While I was responsible for getting QEMU’s vfio-user client upstreamed, I was by no means the only person involved. My series was heavily based upon previous work by Oracle by John Johnson and others, and the original work on vfio-user in general was done by Thanos Makatos, Swapnil Ingle, and several others. And big thanks to Cédric Le Goater for all the reviews and help getting the series merged.

Further Work

While the current implementation is working well in general, there’s an awful lot more we could be doing. The client side has enough implemented to cover our immediate needs, but undoubtedly there are other implementations that need extensions. The libvfio-user issues tracker captures a lot of the generic protocol work as well some library-specific issues. In terms of virtual NVMe itself, we have lots of ideas for how to improve the SPDK implementation, across performance, correctness, and functionality.

There is an awful lot more I could talk about here about how this all works “under the hood”; perhaps I will find time to write some more blog posts…


  1. unfortunately, due to a late-breaking regression, you’ll need to use something a little bit more recent than the actual 10.1 release. ↩︎

It's Always DNS Staring at the C

The meme is real, but I think this particular case is sort of interesting, because it turned out, ultimately, to not be due to DNS configuration, but an honest-to-goodness bug in glibc.

As previously mentioned, I heavily rely on email-oauth2-proxy for my work email. Every now and then, I’d see a failure like this:

    Email OAuth 2.0 Proxy: Caught network error in IMAP server at [::]:1993 (unsecured) proxying outlook.office365.com:993 (SSL/TLS) - is there a network connection? Error type <class 'socket.gaierror'> with message: [Errno -2] Name or service not known

This always coincided with a change in my network, but - and this is the issue - the app never recovered. Even though other processes - even Python ones - could happily resolve outlook.office365.com - this long-running daemon remained stuck, until it was restarted.

A bug in the proxy?

My first suspect here was this bit of code:

    1761     def create_socket(self, socket_family=socket.AF_UNSPEC, socket_type=socket.SOCK_STREAM):
1762         # connect to whichever resolved IPv4 or IPv6 address is returned first by the system
1763         for a in socket.getaddrinfo(self.server_address[0], self.server_address[1], socket_family, socket.SOCK_STREAM):
1764             super().create_socket(a[0], socket.SOCK_STREAM)
1765             return

We’re looping across the gai results, but returning after the first one, and there’s no attempt to account for the first address result being unreachable, but later ones being fine.

Makes no sense, right? My guess was that somehow getaddrinfo() was returning IPv6 results first in this list, as at the time, the IPv6 configuration on the host was a little wonky. Perhaps I needed to tweak gai.conf ?

However, while this was a proxy bug, it was not the cause of my issue.

DNS caching?

Perhaps, then, this is a local DNS cache issue? Other processes work OK, even Python test programs, so it didn’t seem likely to be the system-level resolver caching stale results. Python itself doesn’t seem to cache results.

This case triggered (sometimes) when my VPN connection died. The openconnect vpnc script had correctly updated /etc/resolv.conf back to the original configuration, and as there’s no caching in the way, then the overall system state looked correct. But somehow, this process still had wonky DNS?

A live reproduction

I was not going to get any further until I had a live reproduction and the spare time to investigate it before restarting the proxy.

The running proxy in this state could be triggered easily by waking up fetchmail, which made it much easier to investigate what was happening each time.

So what was the proxy doing on line :1763 above? Here’s an strace snippet:

    [pid  1552] socket(AF_INET, SOCK_DGRAM|SOCK_CLOEXEC|SOCK_NONBLOCK, IPPROTO_IP) = 7
[pid  1552] setsockopt(7, SOL_IP, IP_RECVERR, [1], 4) = 0
[pid  1552] connect(7, {sa_family=AF_INET, sin_port=htons(53), sin_addr=inet_addr("ELIDED")}, 16) = 0
[pid  1552] poll([{fd=7, events=POLLOUT}], 1, 0) = 1 ([{fd=7, revents=POLLOUT}])
[pid  1552] sendto(7, "\250\227\1 \0\1\0\0\0\0\0\1\7outlook\toffice365\3c"..., 50, MSG_NOSIGNAL, NULL, 0) = 50
[pid  1552] poll([{fd=7, events=POLLIN}], 1, 5000) = 1 ([{fd=7, revents=POLLERR}])
[pid  1552] close(7)                    = 0

As we might expect, we’re opening a socket, connecting over UDP to port 53, and sending out a request to the DNS server.

This indicated the proximal issue: the DNS server IP address was wrong - the DNS servers used were the ones originally set up by openconnect still. The process wasn’t incorrectly caching DNS results but the DNS servers. Forever.

Nameserver configuration itself is not something that applications typically control, so the next question was - how does this work normally? When I update /etc/resolv.conf, or the thousand other ways to configure name resolution in modern Linux systems, what makes getaddrinfo() continue to work, normally?

/etc/resolv.conf and glibc

So, how does glibc account for changes in resolver configuration?

The contents of the /etc/resolv.conf file are the canonical location for DNS server addresses for processes (like Python ones) using the standard glibc resolver. Logically then, there must be a way for updates to the file to affect running processes.

In glibc, such configuration is represented by struct resolv_context. This is lazily initialized via __resolv_context_get()->maybe_init(), which looks like this:

     68 /* Initialize *RESP if RES_INIT is not yet set in RESP->options, or if
 69    res_init in some other thread requested re-initializing.  */
 70 static __attribute__ ((warn_unused_result)) bool
 71 maybe_init (struct resolv_context *ctx, bool preinit)
 72 {
 73   struct __res_state *resp = ctx->resp;
 74   if (resp->options & RES_INIT)
 75     {
 76       if (resp->options & RES_NORELOAD)
 77         /* Configuration reloading was explicitly disabled.  */
 78         return true;
 79
 80       /* If there is no associated resolv_conf object despite the
 81          initialization, something modified *ctx->resp.  Do not
 82          override those changes.  */
 83       if (ctx->conf != NULL && replicated_configuration_matches (ctx))
 84         {
 85           struct resolv_conf *current = __resolv_conf_get_current ();
 86           if (current == NULL)
 87             return false;
 88
 89           /* Check if the configuration changed.  */
 90           if (current != ctx->conf)
...

Let’s take a look at __resolv_conf_get_current():

    123 struct resolv_conf *
124 __resolv_conf_get_current (void)
125 {
126   struct file_change_detection initial;
127   if (!__file_change_detection_for_path (&initial, _PATH_RESCONF))
128     return NULL;
129
130   struct resolv_conf_global *global_copy = get_locked_global ();
131   if (global_copy == NULL)
132     return NULL;
133   struct resolv_conf *conf;
134   if (global_copy->conf_current != NULL
135       && __file_is_unchanged (&initial, &global_copy->file_resolve_conf))

This is the file change detection code we’re looking for: _PATH_RESCONF is /etc/resolv.conf, and __file_is_unchanged() compares the cached values of things like the file mtime and so on against the one on disk.

If it has in fact changed, then maybe_init() is supposed to go down the “reload configuration” path.

Now, in my case, this wasn’t happening. And the reason for this is line 83 above: the replicated_configuration_matches() call.

Resolution options

We already briefly mentioned gai.conf. There is also, as the resolver.3 man page says, this interface:

    The resolver routines use configuration and state information
contained in a __res_state structure (either passed as the statep
argument, or in the global variable _res, in the case of the
older nonreentrant functions).  The only field of this structure
that is normally manipulated by the user is the options field.

So an application can dynamically alter options too, outside of whatever static configuration there is. And (I think) that’s why we have the replicated_configuration_matches() check:

    static bool
replicated_configuration_matches (const struct resolv_context *ctx)
{
  return ctx->resp->options == ctx->conf->options
    && ctx->resp->retrans == ctx->conf->retrans
    && ctx->resp->retry == ctx->conf->retry
    && ctx->resp->ndots == ctx->conf->ndots;
}

The idea being, if the application has explicitly diverged its options, it doesn’t want them to be reverted just because the static configuration changed. Our Python application isn’t changing anything here, so this should still work as expected.

In fact, though, we find that it’s returning false: the dynamic configuration has somehow acquired the extra options RES_SNGLKUP and RES_SNGLKUPREOP. We’re now very close to the source of the problem!

A hack that bites

So what could possibly set these flags? Turns out the send_dg() function does:

     999                   {
1000                     /* There are quite a few broken name servers out
1001                        there which don't handle two outstanding
1002                        requests from the same source.  There are also
1003                        broken firewall settings.  If we time out after
1004                        having received one answer switch to the mode
1005                        where we send the second request only once we
1006                        have received the first answer.  */
1007                     if (!single_request)
1008                       {
1009                         statp->options |= RES_SNGLKUP;
1010                         single_request = true;
1011                         *gotsomewhere = save_gotsomewhere;
1012                         goto retry;
1013                       }
1014                     else if (!single_request_reopen)
1015                       {
1016                         statp->options |= RES_SNGLKUPREOP;
1017                         single_request_reopen = true;
1018                         *gotsomewhere = save_gotsomewhere;
1019                         __res_iclose (statp, false);
1020                         goto retry_reopen;
1021                       }

Now, I don’t believe the relevant nameservers have such a bug. Rather, what seems to be happening is that when the VPN connection drops, making the servers inaccessible, we hit this path. And these flags are treated by maybe_init() as if the client application set them, and has thus diverged from the static configuration. As the application itself has no control over these options being set like this, this seemd like a real glibc bug.

The fix

I originally reported this to the list back in March; I was not confident in my analysis but the maintainers confirmed the issue. More recently, they fixed it. The actual fix was pretty simple: apply the workaround flags to statp->_flags instead, so they don’t affect the logic in maybe_init(). Thanks DJ Delorie!
Scroll wheel behaviour in vim with gnome-terminal Staring at the C

I intentionally have mouse support disabled in vim, as I find not being able to select text the same way as in any other terminal screen unergonomic.

However, this has an annoying problem as a libvte / gnome-terminal user: the terminal, on switching to an “alternate screen” application like vim that has mouse support disabled, “helpfully” maps scroll wheel events to arrow up/down events.

This is possibly fine, except I use the scroll wheel click as middle-button paste, and I’m constantly accidentally pasting something in the wrong place as a result.

This is unfixable from within vim, since it only sees normal arrow key presses (not ScrollWheelUp and so on).

However, you can turn this off in libvte, by the magic escape sequence:

echo -ne '\e[?1007l'

Also known as XTERM_ALTBUF_SCROLL. This is mentioned in passing in this ticket. Documentation in general is - at best - sparse, but you can always go to the source.

A Headless Office 365 Proxy Staring at the C

As I mentioned in my last post, I’ve been experimenting with replacing davmail with Simon Robinson’s super-cool email-oauth2-proxy, and hooking fetchmail and mutt up to it. As before, here’s a specific rundown of how I configured O365 access using this.

Configuration

We need some small tweaks to the shipped configuration file. It’s used for both permanent configuration and acquired tokens, but the static part looks something like this:

[email@yourcompany.com]
permission_url = https://login.microsoftonline.com/common/oauth2/v2.0/authorize
token_url = https://login.microsoftonline.com/common/oauth2/v2.0/token
oauth2_scope = https://outlook.office365.com/IMAP.AccessAsUser.All https://outlook.office365.com/POP.AccessAsUser.All https://outlook.office365.com/SMTP.Send offline_access
redirect_uri = https://login.microsoftonline.com/common/oauth2/nativeclient
client_id = facd6cff-a294-4415-b59f-c5b01937d7bd
client_secret =

We’re re-using davmail’s client_id again.

Updated 2023-10-10: emailproxy now supports a proper headless mode, as discussed below.

Updated 2022-11-22: you also want to set delete_account_token_on_password_error to False: otherwise, a typo will delete the tokens, and you’ll need to re-authenticate from scratch.

We’ll configure fetchmail as follows:

poll localhost protocol IMAP port 1993
 auth password username "email@yourcompany.com"
 is localuser here
 keep
 sslmode none
 mda "/usr/bin/procmail -d %T"
 folders INBOX

and mutt like this:

set smtp_url = "smtp://email@yourcompany.com@localhost:1587/"
unset smtp_pass
set ssl_starttls=no
set ssl_force_tls=no

When you first connect, you will get a GUI pop-up and you need to interact with the tray menu to follow the authorization flow. After that, the proxy will refresh tokens as necessary.

Running in systemd

Here’s my service file I use, slightly modified from the upstream’s README:

$ cat /etc/systemd/system/emailproxy.service
[Unit]
Description=Email OAuth 2.0 Proxy

[Service]
ExecStart=/usr/bin/python3 /home/localuser/src/email-oauth2-proxy/emailproxy.py --external-auth --no-gui --config-file /home/localuser/src/email-oauth2-proxy/my.config
Restart=always
User=joebloggs
Group=joebloggs

[Install]
WantedBy=multi-user.target

Headless operation

Typically, only initial authorizations require the GUI, so you could easily do the initial dance then use the above systemd service.

Even better, with current versions of email-oauth2-proxy, you can operate in an entirely headless manner! With the above --external-auth and --no-gui options, the proxy will prompt on stdin with a URL you can copy into your browser; pasting the response URL back in will authorize the proxy, and store the necessary access and refresh tokens in the config file you specify.

For example:

$ sudo systemctl stop emailproxy

$ python3 ./emailproxy.py --external-auth --no-gui --config-file /home/localuser/src/email-oauth2-proxy/my.config

# Now connect from mutt or fetchmail.

Authorisation request received for email@yourcompany.com (external auth mode)
Email OAuth 2.0 Proxy No-GUI external auth mode: please authorise a request for account email@yourcompany.com
Please visit the following URL to authenticate account email@yourcompany.com: https://login.microsoftonline.com/common/oauth2/v2.0/authorize?client_id=...

Copy+paste or press [↵ Return] to visit the following URL and authenticate account email@yourcompany.com: https://login.microsoftonline.com/common/oauth2/v2.0/authorize?client_id=...
then paste here the full post-authentication URL from the browser's address bar (it should start with https://login.microsoftonline.com/common/oauth2/nativeclient):

# Paste the updated URL bar contents from your browser in response:

https://login.microsoftonline.com/common/oauth2/nativeclient?code=...

SMTP (localhost:1587; email@yourcompany.com) [ Successfully authenticated SMTP connection - releasing session ]
^C
$ sudo systemctl start emailproxy

Obviously, you’ll need to do this interactively from the terminal, then restart in daemon mode.

email-oauth2-proxy

If you find the above details useful, consider donating to support Simon’s sterling work on oauth2-email-proxy.

Fetchmail and Office 365 Staring at the C

I previously described accessing Office365 email (and in particular its oauth2 flow) via davmail, allowing me to continue using fetchmail, procmail and mutt. As davmail is java, it’s a pain to have around, so I thought I’d give some details on how to do this more directly in fetchmail, as all the available docs I found were a little vague, and it’s quite easy to screw up.

As it happens, I came across a generally better solution shortly after writing this post, on which more later.

Fetchmail 7

Unfortunately there is little interest in releasing a Fetchmail version with oauth2 support - the maintainer is taking a political stance on not integrating it - so you’ll need to check out the next branch from git:

cd ~/src/
git clone -b next git@gitlab.com:fetchmail/fetchmail.git fetchmail-next
cd fetchmail-next
./autogen.sh && ./configure --prefix=/opt/fetchmail7 && make && sudo make install

I used the branch as of 43c18a54 Merge branch 'legacy_6x' into next. Given that the maintainer warns us they might remove oauth2 support, you might need this exact hash…

Generate a token

We need to go through the usual flow for getting an initial token. There’s a helper script for this, but first we need a config file:

user=email@yourcompany.com
client_id=facd6cff-a294-4415-b59f-c5b01937d7bd
client_secret=
refresh_token_file=/home/localuser/.fetchmail-refresh
access_token_file=/home//localuser/.fetchmail-token
imap_server=outlook.office365.com
smtp_server=outlook.office365.com
scope=https://outlook.office365.com/IMAP.AccessAsUser.All https://outlook.office365.com/POP.AccessAsUser.All https://outlook.office365.com/SMTP.Send offline_access
auth_url=https://login.microsoftonline.com/common/oauth2/v2.0/authorize
token_url=https://login.microsoftonline.com/common/oauth2/v2.0/token
redirect_uri=https://login.microsoftonline.com/common/oauth2/nativeclient

Replace email@yourcompany.com and localuser in the above, and put it at ~/.fetchmail.oauth2.cfg. It’s rare to find somebody mention this, but O365 does not need a client_secret, and we’re just going to borrow davmail’s client_id - it’s not a secret in any way, and trying to get your own is a royal pain. Also, if you see a reference to tenant_id anywhere, ignore it - common is what we need here.

Run the flow:

$ # This doesn't get installed...
$ chmod +x ~/src/fetchmail-next/contrib/fetchmail-oauth2.py
$ # Sigh.
$ sed -i 's+/usr/bin/python+/usr/bin/python3+' ~/src/fetchmail-next/contrib/fetchmail-oauth2.py
$ ~/src/fetchmail-next/contrib/fetchmail-oauth2.py -c ~/.fetchmail.oauth2.cfg --obtain_refresh_token_file
To authorize token, visit this url and follow the directions:
  https://login.microsoftonline.com/common/oauth2/v2.0/authorize?...
Enter verification code:

Unlike davmail, this needs just the code, not the full returned URL, so you’ll need to be careful to dig out just the code from the response URL (watch out for any session_state parameter at the end!).

This will give you an access token that will last for around an hour.

Fetchmail configuration

Now we need an oauthbearer .fetchmailrc like this:

set daemon 60
set no bouncemail
poll outlook.office365.com protocol IMAP port 993
 auth oauthbearer username "email@yourcompany.com"
 passwordfile "/home/localuser/.fetchmail-token"
 is localuser here
 keep
 sslmode wrapped sslcertck
 folders INBOX
 mda "/usr/bin/procmail -d %T"

Replace email@yourcompany.com and localuser.

At this point, hopefully starting /opt/fetchmail7/bin/fetchmail will work!

Refresh tokens

As per the OAUTH2 README, fetchmail itself does not take care of refreshing the token, so you need something like this in your crontab:

*/2 * * * * $HOME/src/fetchmail-next/contrib/fetchmail-oauth2.py -c $HOME/.fetchmail.oauth2.cfg --auto_refresh

#opensolaris Staring at the C

When OpenSolaris got started, #solaris was a channel filled with pointless rants about GNU-this and Linux-that. Beside complete wrong-headedness, it was a total waste of time and extremely hostile to new people. #opensolaris, in contrast, was actually pretty nice (for IRC!) - sure, the usual pointless discussions but it certainly wasn't hateful.

Recently I'm sad to say #opensolaris has become a really hostile, unpleasant place. I've seen new people arrive and be bullied by a small number of poisonous people until they went away (nice own goal, people!). So if anyone's looking for me for xVM stuff or whatever, I'll be in #onnv-scm or #solaris-xen as usual. And if you do so, please try to keep a civil tongue in your head - it's not hard.

$HOME Staring at the C

I've not been able to access my homedir (and hence my work mail) all day. I suspect this was a planned outage I've forgotten about, but it's still a big problem. And what kind of planned outage lasts all day?

Link Staring at the C

Our $100M Series B Oxide Computer Company Blog

We don’t want to bury the lede: we have raised a $100M Series B, led by a new strategic partner in USIT with participation from all existing Oxide investors. To put that number in perspective: over the nearly six year lifetime of the company, we have raised $89M; our $100M Series B more than doubles our total capital raised to date — and positions us to make Oxide the generational company that we have always aspired it to be.

If this aspiration seems heady now, it seemed absolutely outlandish when we were first raising venture capital in 2019. Our thesis was that cloud computing was the future of all computing; that running on-premises would remain (or become!) strategically important for many; that the entire stack — hardware and software — needed to be rethought from first principles to serve this market; and that a large, durable, public company could be built by whomever pulled it off.

This scope wasn’t immediately clear to all potential investors, some of whom seemed to latch on to one aspect or another without understanding the whole. Their objections were revealing: "We know you can build this," began more than one venture capitalist (at which we bit our tongue; were we not properly explaining what we intended to build?!), "but we don’t think that there is a market."

Entrepreneurs must become accustomed to rejection, but this flavor was particularly frustrating because it was exactly backwards: we felt that there was in fact substantial technical risk in the enormity of the task we put before ourselves — but we also knew that if we could build it (a huge if!) there was a huge market, desperate for cloud computing on-premises.

Fortunately, in Eclipse Ventures we found investors who saw what we saw: that the most important products come when we co-design hardware and software together, and that the on-premises market was sick of being told that they either don’t exist or that they don’t deserve modernity. These bold investors — like the customers we sought to serve — had been waiting for this company to come along; we raised seed capital, and started building.

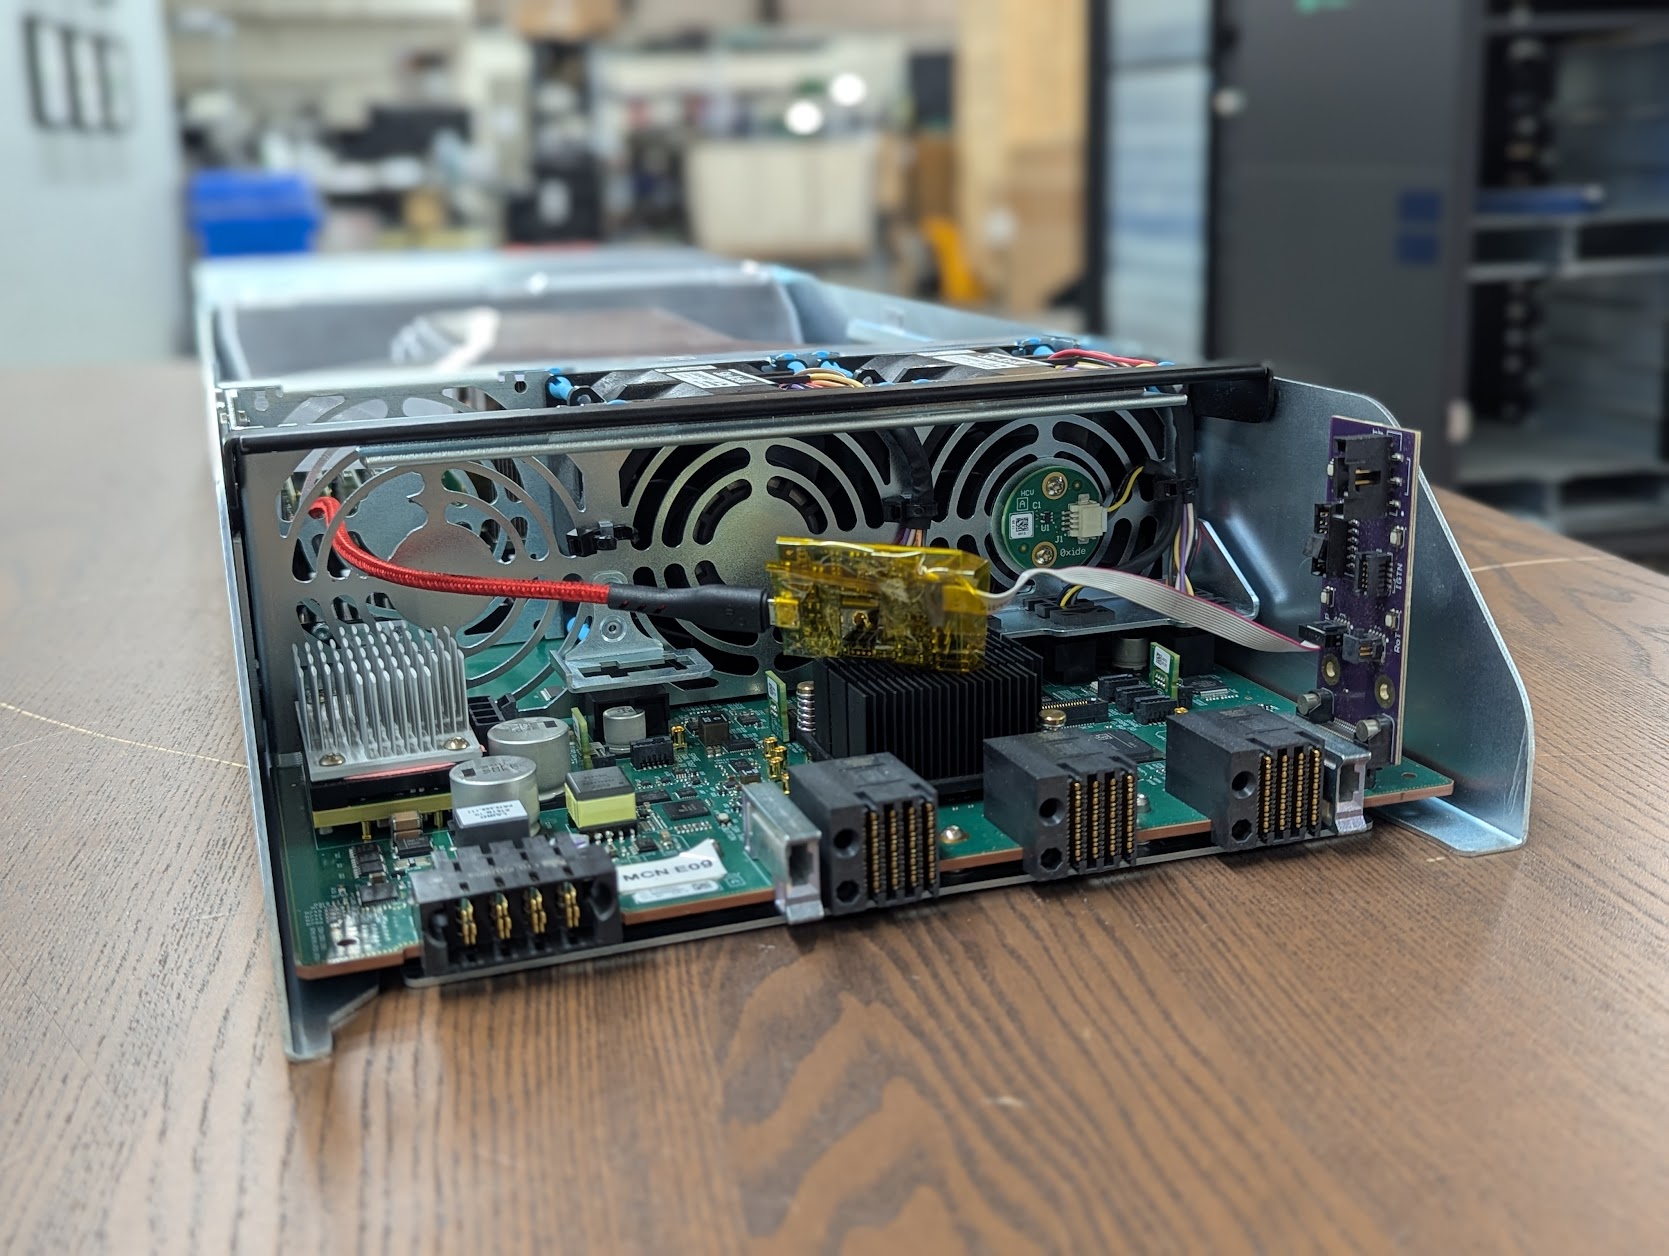
And build it we did, making good on our initial technical vision:

While these technological components are each very important (and each is in service to specific customer problems when deploying infrastructure on-premises), the objective is the product, not its parts. The journey to a product was long, but we ticked off the milestones. We got the boards brought up. We got the switch transiting packets. We got the control plane working. We got the rack manufactured. We passed FCC compliance.

And finally, two years ago, we shipped our first system!

Shortly thereafter, more milestones of the variety you can only get after shipping: our first update of the software in the field; our first update-delivered performance improvements; our first customer-requested features added as part of an update.

Later that year, we hit general commercial availability, and things started accelerating. We had more customers — and our first multi-rack customer. We had customers go on the record about why they had selected Oxide — and customers describing the wins that they had seen deploying Oxide.

Customers started landing faster now: enterprise sales cycles are infamously long, but we were finding that we were going from first conversations to a delivered product surprisingly quickly. The quickening pace always seemed to be due in some way to our transparency: new customers were listeners to our podcast, or they had read our RFDs, or they had perused our documentation, or they had looked at the source code itself.

With growing customer enthusiasm, we were increasingly getting questions about what it would look like to buy a large number of Oxide racks. Could we manufacture them? Could we support them? Could we make them easy to operate together?

Into this excitement, a new potential investor, USIT, got to know us. They asked terrific questions, and we found a shared disposition towards building lasting value and doing it the right way. We learned more about them, too, and especially USIT’s founder, Thomas Tull. The more we each learned about the other, the more there was to like. And importantly, USIT had the vision for us that we had for ourselves: that there was a big, important market here — and that it was uniquely served by Oxide.

We are elated to announce this new, exciting phase of the company. It’s not necessarily in our nature to celebrate fundraising, but this is a big milestone, because it will allow us to address our customers' most pressing questions around scale (manufacturing scale, system scale, operations scale) and roadmap scope. We have always believed in our mission, but this raise gives us a new sense of confidence when we say it: we’re going to kick butt, have fun, not cheat (of course!), love our customers — and change computing forever.

Triton on SmartOS bhyve Nahum Shalman

Motivation

I (still) don't run VMware but I do have a SmartOS machine (it's a little nicer than the one from a decade ago).
I now work on Triton for my day job and I want to run CoaL for some testing.

Networking

The first trick is going to be to get some appropriate network tags set up and configured in the way that the CoaL image expects. I'm going to set up both an admin network and an "external" network. The latter will perform the same NAT that gets configured by the scripts for use with VMware.

Admin network.

This is a private network that doesn't need to reach the internet. Since I'll be confining my experiments to a single SmartOS hypervisor I'll just use an etherstub:

    nictagadm add -l sdc_admin0

External network.

This one is tricker. CoaL expects this to be a network that can reach the network via NAT. We'll create another etherstub for it, then we'll create a zone to do NAT using Etherstubs:

    nictagadm add -l sdc_external0

Provision a zone to be the NAT router using the following json (you can use whatever image_uuid you want, it doesn't actually matter):
coal-nat.json

    {
  "alias": "coal-nat",
  "hostname": "coal-nat",
  "brand": "joyent-minimal",
  "max_physical_memory": 128,
  "image_uuid": "2f1dc911-6401-4fa4-8e9d-67ea2e39c271",
  "nics": [
    {
      "nic_tag": "external",
      "ip": "dhcp",
      "allow_ip_spoofing": "1",
      "primary": "1"
    },
    {
      "nic_tag": "sdc_external0",
      "ip": "10.88.88.2",
      "netmask": "255.255.255.0",
      "allow_ip_spoofing": "1",
      "gateway": "10.88.88.2"
    }
  ],
  "customer_metadata" : {
    "manifests" : "network/forwarding.xml\nnetwork/routing/route.xml\nnetwork/routing/ripng.xml\nnetwork/routing/legacy-routing.xml\nnetwork/ipfilter.xml\nsystem/identity.xml\n",
    "smf-import" : "mdata-get manifests | while read name; do svccfg import /lib/svc/manifest/$name; done;",
    "user-script" : "mdata-get smf-import | bash -x; echo -e 'map net0 10.88.88.0/24 -> 0/32\nrdr net0 0/0 port 22 -> 10.88.88.200 port 22 tcp' > /etc/ipf/ipnat.conf; routeadm -u -e ipv4-forwarding; svcadm enable identity:domain; svcadm enable ipfilter"
  }
}

You can also set a static IP address on the first NIC if you prefer.

Create the zone:

    vmadm create -f coal-nat.json

Building the headnode VM

Normally SmartOS provides a lot of protection on the vnics. We'll be turning them all off so that the guest can do whatever it wants. This is one of the reasons I like setting up the etherstubs. Even if this VM runs amok the only other zone it can reach is that very minimal NAT zone.

We need to specify the hardcoded MAC addresses that the answers.json file is expecting to see as well:
coal-headnode.json:

    {
  "alias": "coal-headnode",
  "brand": "bhyve",
  "bootrom": "uefi",
  "ram": 16384,
  "vcpus": 4,
  "autoboot": false,
  "nics": [
    {
      "mac": "00:50:56:34:60:4c",
      "nic_tag": "sdc_admin0",
      "model": "virtio",
      "ip": "dhcp",
      "allow_dhcp_spoofing": true,
      "allow_ip_spoofing": true,
      "allow_mac_spoofing": true,
      "allow_restricted_traffic": true,
      "allow_unfiltered_promisc": true,
      "dhcp_server": true
    },
    {
      "mac": "00:50:56:3d:a7:95",
      "nic_tag": "sdc_external0",
      "model": "virtio",
      "ip": "dhcp",
      "allow_dhcp_spoofing": true,
      "allow_ip_spoofing": true,
      "allow_mac_spoofing": true,
      "allow_restricted_traffic": true,
      "allow_unfiltered_promisc": true,
      "dhcp_server": true
    }
  ],
  "disks": [
    {
      "boot": true,
      "size": 8192,
      "model": "virtio"
    },
    {
      "size": 65440,
      "model": "virtio"
    }
  ]
}

Create the VM and get the UUID:

    vmadm create -f coal-headnode.json
UUID=$(vmadm list -H -o uuid alias=coal-headnode)

Copying over the CoaL USB stick image

Triton releases live at https://us-central.manta.mnx.io/Joyent_Dev/public/SmartDataCenter/triton.html

    zfs set refreservation=0 zones/${UUID}/disk0

RELEASE=release-20250724-20250724T033959Z-gb8f2d08
curl -fLO https://us-central.manta.mnx.io/Joyent_Dev/public/SmartDataCenter/${RELEASE?}/headnode/usb-${RELEASE?}.tgz
tar xvf usb-${RELEASE?}.tgz usb-${RELEASE?}-8gb.img
qemu-img convert -f raw -O host_device usb-${RELEASE?}-8gb.img /dev/zvol/dsk/zones/${UUID?}/disk0

zfs snapshot zones/${UUID?}/disk0@sdc-pristine
zfs snapshot zones/${UUID?}/disk1@sdc-pristine

Pre-configuring Triton

We need to obtain the CoaL answers.json file and reconfigure Loader so that it will behave correctly in the VM.

    lofiadm -l -a /dev/zvol/dsk/zones/${UUID?}/disk0
mount -F pcfs /devices/pseudo/lofi@2:c /mnt
curl -kL https://raw.githubusercontent.com/tritondatacenter/sdc-headnode/master/answers.json.tmpl.external | sed 's/vga/ttya/g' > /mnt/private/answers.json
cp /mnt/boot/loader.conf /mnt/boot/loader.conf.orig
cat /mnt/boot/loader.conf.orig | sed '/hash_name=/d;/console/s/ttyb/ttya/;/console/s/,.*text/,text/;/tty[^a]-mode/d;s/ipxe="true"/ipxe="false"/' > /mnt/boot/loader.conf
umount /mnt
lofiadm -d /dev/lofi/2
zfs snapshot zones/${UUID?}/disk0@configured

Optional: Get a performance boost at the cost of potential VM data corruption if the host loses power:

    zfs set sync=disabled zones/${UUID?}

Now you're ready to boot your VM.

    vmadm start ${UUID?} ; vmadm console ${UUID?}

Adding a Compute Node

For the moment I don't have a great answer to how to make the Compute Node PXE boot. This is my current workaround:

coal-computenode.json:

    {
  "alias": "coal-computenode",
  "brand": "bhyve",
  "bootrom": "uefi",
  "ram": 4096,
  "vcpus": 4,
  "autoboot": false,
  "nics": [
    {
      "nic_tag": "sdc_admin0",
      "model": "virtio",
      "ip": "dhcp",
      "allow_dhcp_spoofing": true,
      "allow_ip_spoofing": true,
      "allow_mac_spoofing": true,
      "allow_restricted_traffic": true,
      "allow_unfiltered_promisc": true,
      "dhcp_server": true
    },
    {
      "nic_tag": "sdc_external0",
      "model": "virtio",
      "ip": "dhcp",
      "allow_dhcp_spoofing": true,
      "allow_ip_spoofing": true,
      "allow_mac_spoofing": true,
      "allow_restricted_traffic": true,
      "allow_unfiltered_promisc": true,
      "dhcp_server": true
    }
  ],
  "disks": [
    {
      "boot": true,
      "media": "cdrom",
      "path": "/ipxe/ipxe.iso",
      "model": "virtio"
    },
    {
      "size": 16000,
      "model": "virtio"
    }
  ]
}

Create the VM and get the UUID, then inject a usable ipxe ISO for netbooting:

    CN_UUID=$(vmadm create -f coal-computenode.json 2>&1 |tee /dev/stderr | awk 'END{print $NF}')
mkdir -p /zones/${CN_UUID?}/root/ipxe
curl -fL -o /zones/${CN_UUID?}/root/ipxe/ipxe.iso https://raw.githubusercontent.com/tinkerbell/ipxedust/refs/heads/main/binary/ipxe.iso
vmadm start ${CN_UUID?} ; vmadm console ${CN_UUID?}

B2VT 2025 Josef "Jeff" Sipek

A week ago, I participated in a 242 km bike ride from Wikipedia article:  Bedford to the Wikipedia article:  Harpoon Brewery in Wikipedia article:  Windsor. This was an organized event with about 700 people registered to ride it. I’ve done a number of group rides in the past, but never a major event like this, so I’m going to brain-dump about it. (As a brain-dump, it is not as organized as it could be. Shrug.)

This was not a race, so there is no official timekeeping or ranking.

TL;DR: I rode 242 km in 11 hours and 8 minutes and I lived to tell the tale.

The Course

The full course was a one-way 242 km (150 mile) route with four official rest stops with things to eat and drink. The less insane riders signed up for truncated rides that followed the same route and also ended in Windsor, but skipped the beginning. There was a 182 km option that started at the first rest stop and a 108 km option that started at the second rest stop. Since I did the full ride, I’m going to ignore the shorter options.

The above link to RideWithGPS has the whole course and you can zoom around to your heart’s content, but the gist of it is:

Rest Stops, Food, Drinks

The four official rest stops were at 58 km, 132 km, 169 km, and 220 km. The route passed through a number of towns so it was possible to stop at a convenience store and buy whatever one may have needed (at least in theory).

Each rest stop was well-stocked, so I didn’t need to buy anything from any shops along the way.

There was water, Gatorade, and already-prepared Maurten’s drink mix, as well as a variety of sports nutrition “foods”. There were many Maurten gels and bars, GU gels, stroopwafels, bananas, and pickle slices with pickle juice.

Maurten was one of the sponsors, so there was a ton of their products. I tried their various items during training rides, and so I knew what I liked (their Solid 160 bars) and what I found weird (the drink mix and gels, which I describe as runny and chunky slime, respectively).

My plan was to sustain myself off the Maurten bars and some GU gels I brought along because I didn’t know they were also going to be available. I ended up eating the bars (as planned). I tried a few B2VT-provided GU gel flavors I haven’t tried before (they were fine) and a coconut-flavored stroopwafel (a heresy, IMO). I also devoured a number of bananas and enjoyed the pickles with juice. Drink-wise, I had a bottle of Gatorade and a bottle of water with electrolytes. At each stop, I topped off the Gatorade bottle with more Gatorade, and refilled the other bottle with water and added an electrolyte tablet.

The one item I wish they had at the first 3 stops: hot coffee.

With the exception of the second rest stop, I never had to wait more than 30 seconds to get whatever I needed. At the second stop, I think I just got unlucky, and I arrived at a busy time. I spent about 5 minutes in the line, but I didn’t really care. I still had plenty of time and there was John (one of the other riders that I met a few months ago during a training ride) to chat with while waiting.

In addition to the official rest stops, I stopped twice on the way to stretch and eat some of the stuff I had on me. The first extra stop was by the Winchester, NH post office or at about 111 km. The second extra stop was at the last intersection before the climb around Ascutney which conveniently was at 200 km.

Since I’m on the topic of food, the finish had real food—grilled chicken, burgers, hot dogs, etc. I didn’t have much time before my bus back to Bedford left, so I didn’t get to try the chicken. The burgers and hot dogs were a nice change of flavor from the day of consuming variously-packaged sugars and not much else.

Mechanics

Conte’s Bike Shop (also a sponsor) had a few mechanics provide support to anyone who had issues with their bikes. They’d stay at a rest stop, do their magic, and eventually drive to the next stop helping anyone along the way. They easily put in 12 hours of work that day.

Thankfully, I didn’t have any mechanical issues and didn’t need their services.

Weather

Given the time and distance involved, it is no surprise that the weather at the start and finish was quite different. The good news was that the weather steadily improved throughout the ride. The bad news was that it started rather poor—moderate rain. As a result, everyone got thoroughly soaked in the first 20 km. Rain showers and wet roads (at times it wasn’t clear if there is rain or if it’s just road spray) were pretty standard fare until the second rest stop. Between the second and third stops, the roads got progressively drier. By the 4th stop, the weather was positively nice.

None of this was a surprise. Even though the weather forecasts were uncertain about the details, my general expectation was right. As a side note, I find MeteoBlue’s multi-model and ensemble forecasts quite useful when the distilled-to-a-handful-of-numbers forecasts are uncertain. For example, I don’t care if it is going to be 13°C or 15°C when on the bike. I’ll expect it to be chilly. This is, however, a very large range for the single-number temperature forecast and so it’ll be labeled as uncertain. Similarly, I don’t care if I encounter 10 mm or 15 mm of rain in an hour. I’ll be wet either way.

I kept checking the forecasts as soon as they covered the day of the event. After a few days, I got tired of trying to load up multiple pages and correlating them. I wrote a hacky script that uses MeteoBlue’s API to fetch the hourly forecast for the day, and generate a big table with as much (relevant) information as possible.

You can see the generated table with the (now historical) forecast yourself. I generated this one at 03:32—so, about 2 hours before I started.

Each location-hour pair shows what MeteoBlue calls RainSpot, an icon with cloud cover and rain, the wind direction and speed (along with the headwind component), the temperature, and the humidity.

I was planning to better visualize the temperature and humidity and to calculate the headwind along more points along the path, but I got distracted with other preparations.

Temperature-wise, it was a similar story. Bad (chilly) in the beginning and nice (warm but not too warm) at the end.

Clothing

The weather made it extra difficult to plan what to wear. I think I ended up slightly under-dressed in the beginning, but just about right at the end (or possibly a smidge over-dressed). I wore: bib shorts, shoe covers, a short-sleeved polyester shirt, and the official B2VT short-sleeved jersey.

The shoe covers worked well, until they slid down just enough to reveal the top of the socks. At that point it was game over—the socks wicked all the water in the world right into my shoes. So, of the 242 km I had wet feet for about 220 km. Sigh. I should have packed spare socks into the extra bag that the organizers delivered to rest stop 2 (and then to the finish). They wouldn’t have dried out my shoes, but it would have provided a little more comfort at least temporarily.

For parts of the ride, I employed 2 extra items: a plastic trash bag and aluminum foil.

Between the first rest stop and the 200 km break, I wore a plastic trash bag between the jersey and the shirt. While this wasn’t perfect, it definitely helped me not freeze on the long-ish descents and stay reasonably warm at other times. I probably should have put it on before starting, but I had (unreasonably) hoped that it wouldn’t actively rain.

At the second rest stop, I lined my (well-ventilated) helmet with aluminum foil to keep my head warm. When I took it off, my head was a little bit sweaty. In other words, it worked quite well. As a side note, just before I took the foil out at the third rest stop, multiple people at the stop asked me what it was for and whether it worked.

Pacing & Time Geekery

Needless to say, it was a very long day.

My goal was to get to the finish line before it closed at 18:30. So, I came up with a pessimistic timeline that got me to the finish with 23 minutes to spare. I assumed that my average speed would decrease over time as I got progressively more tired—starting off at 26 km/h and crossing the finish line at 18 km/h. I also assumed that I’d go up the 3 major climbs at a snail’s pace of 10 km/h and that I’d spend progressively more time at the stops.

Well, I was guessing at the speeds based on previous experience. The actual plan was to stay in my power zone 2 (144–195W) no matter what the terrain was like. I was willing to go a little bit harder on occasion to stay in someone’s draft, but any sort of solo effort would be in zone 2.

I signed up for the 15 miles/hour pace group (about 24 km/h), which meant that I would start between 5:00 and 5:30 in the morning. I hoped to start at 5:00 but calculated based on 5:30 start time.

Here’s my plan (note that the fourth stop moved from 218 to 220 km few days before the event, and I didn’t bother re-adjusting the plan):


                     Time of Day     Time
               Dist  In    Out    In    Out
Start             0  N/A   05:30  N/A   00:00
Ashby climb      51  07:27 08:09  01:57 02:39
#1               58  08:09 08:24  02:39 02:54
Hinsdale climb  121  10:55 11:37  05:25 06:07
#2              132  11:37 11:57  06:07 06:27
#3              168  13:35 13:55  08:05 08:25
Ascutney climb  198  15:21 16:15  09:51 10:45
#4              218  16:25 16:50  10:55 11:20
Finish          241  18:07 N/A    12:37 N/A

To have a reference handy, I taped the rest stop distances and expected “out” times to my top-tube:

(After I started writing it, I realized that the start line was totally useless and I should have skipped it. That extra space could have been used for the expected finish time.)

So, how did I do in reality?

Well, I didn’t want to rush in the morning so I ended up starting at 5:30 instead of the planned for 5:00. Oh well.

Until the 4th stop, it felt like I was about 30 minutes ahead of (worst case) schedule, but when I got to the 4th stop I realized that I had a ton of extra time. Regardless, I didn’t delay and headed out toward the finish. I was really surprised that I managed to finish it in just over 11 hours.

Here’s a table comparing the planned (worst case) with the actual times along with deltas between the two.


                       Planned      Actual        Delta
               Dist  In    Out    In    Out    In    Out
Start             0  N/A   00:00  N/A   00:00  N/A   +0:00
Ashby climb      51  01:57 02:39  01:53 02:17  -0:04 -0:22
#1               58  02:39 02:54  02:17 02:33  -0:22 -0:21
Hinsdale climb  121  05:25 06:07  04:59 05:41  -0:26 -0:26
#2              132  06:07 06:27  05:41 06:10  -0:26 -0:17
#3              168  08:05 08:25  07:34 07:55  -0:31 -0:30
Ascutney climb  198  09:51 10:45  09:13 09:37  -0:38 -1:08
#4              218  10:55 11:20  10:08 10:20  -0:47 -1:00
Finish          241  12:37 N/A    11:08 N/A    -1:29 N/A

It is interesting to see that I spent 1h18m at the rest stops (16, 29, 21, and 12 minutes), while I planned for 1h20m (15, 20, 20, and 25 minutes). If I factor in the two pauses I did on my own (3 minutes at 111 km and 9 minutes at 200 km), I spent 1h30m stopped. I knew I was ahead of schedule, and so I didn’t rush at the stops as rushing tends to lead to errors that take more time to rectify than not-rushing would have taken.

I’m also happy to see that my 10 km/h semi-arbitrary estimate for the climbs worked well enough on the first climb and was spot on for the second. The third climb wasn’t as bad, but I stuck with the same estimated speed because I assumed I’d be much more fatigued than I was.

To have a better idea about my average speed after the ride, I plotted my raw speed as well as cumulative average speed that’s reset every time I stop. (In other words, it is the average speed I’d see on the Garmin at any given point in time if I pressed the lap button every time I stopped.) The x-axis is time in minutes, and the y-axis is generally km/h (the exception being the green line which is just the orange line converted to miles per hour).

The average line is 21.7 km/h which is the distance over total elapsed time (11:08). If I ignore all the stopped time and look at only the moving time (9:43), the average speed ends up being 24.9 km/h. Nice!

Power-wise, I did reasonably well. I spent almost 2/3 of the time in zones 1 and 2. I spent a bit more time in zone 3 than I expected, but a large fraction of that is right around 200W. 200 is a number that’s a whole lot easier to remember while riding and so I treat it as the top of my zone 2.

Fatigue & Other Riders

I knew what to expect (more or less) over the first 2/3 of the ride as my longest ride before was 163 km. In many ways, it felt as I expected and in some ways it was a very different ride.

At the third rest stop (168 km), I felt a bit less drained than I expected. I’m guessing that’s because I actively tried to go very easy—to make sure I had something left in me for the last 70 km.

Sitting on the saddle felt as I expected: slowly getting less and less enjoyable but still ok. It is rather annoying that at times one has to choose between drafting and getting out of the saddle for comfort.

What was very different was the “mental progress bar”. Somehow, 160 km feels worse if you are planning to do 163 km than if you are planning to do 242 km. It’s like the mind calibrates the sensations based on the expected distance. Leaving the third rest stop felt like venturing into the unknown. Passing 200 km felt exciting—first time I’ve ever seen a three digit distance starting with anything other than a 1 and only 42 km left to the finish! Leaving the fourth rest stop felt surprisingly good because there were only 22 km left and tons of time to do it in.

In general, I was completely shameless about drafting. If you passed me anywhere except a bigger uphill, I’d hop onto your wheel and stay for as long as possible.

Between about 185–200 km, I was following one such group of riders. This is when I really noticed how tired and sore some people got by this point. One of them got out of the saddle every 30–60 seconds. I don’t blame him, but following him was extra hard since every time he’d get up, he’d ever-so-slightly slow down. That group as a whole was a little incohesive at that point. I tried to help bring a little bit of order to the chaos by taking a pull, but it didn’t help enough for my taste. So, as we got to the intersection right before the climb around Mount Ascutney, I let them go and took a break to celebrate reaching 200 km with some well-earned crackers.

After the long and steady climb from that intersection, the terrain is mostly flat. This is when I noticed another rider’s fatigue. As I passed him solo, he jumped onto my wheel. After a minute or two, he asked me if I knew how much further it is. I found this a bit peculiar—knowing how far one has gone or how much is left is something I spent hours thinking about. I gave him how far I’ve gone (216 km), how long the course is (240 km), did quick & dirty math to give him an idea what’s left, and I threw in that the rest stop is in about 3 km. Then about a minute later, I realized that he dropped while I continued at 200W.

After the mostly flat part, there was a steep but relatively short uphill to the fourth rest stop. This is when I stopped caring about being quite so religious about sticking to 200W max. Instead of spinning up it, I got out of the saddle and went at a more natural-for-me climbing pace (which isn’t sustainable long term). To my surprise, my legs felt fine! Well, it was not quite a surprise since I know that my aerobic ability is (relatively speaking) worse than my anaerobic ability, but it was nice to see that I could still do a bigger effort even after about 5000 kJ of work.

One additional observation I have about long non-solo events like this is that unless you show up with a group of people that will ride together, it is only a matter of time before everyone spreads out based on their preferred pace and you end up solo. People (perhaps correctly) place greater value on sticking to their own pace instead of pushing closer to their limit to keep up with faster people and therefore finishing sooner. I noticed this during the last B2VT training ride and saw it happen again during the real ride. This is much different from the Sunday group rides I’ve attended where people use as much effort as needed to stay with the group.

Conclusion

Overall I’m happy I tried to do this and that I finished. My previous longest-ride was 163 km, so this was 48% longer and therefore it was nice to see that I could do this if I wanted to. Which brings up the obvious question—will I do this again? At least at the moment, my answer is no. Getting ready for a long ride like that takes long rides, and long rides (even something like 5–6 hours) are harder to fit into my schedule, which includes work and plenty of other hobbies. So, at least for the foreseeable future, I’ll stick to 2–2.5 hour rides max with an occasional 100 km.

Garmin Edge 500 & 840 Josef "Jeff" Sipek

First, a little bit of history…

Many years ago, I tried various phone apps for recording my bike rides. Eventually, I settled on Strava. This worked great for the recording itself, but because my phone was stowed away in my saddle bag, I didn’t get to see my current speed, etc. So, in July 2012, I splurged and got a Garmin Edge 500 cycling computer. I used the 500 until a couple of months ago when I borrowed a 520 with a dying battery from someone who just upgraded and wasn’t using it. (I kept using the 500 as a backup for most of my rides—tucked away in a pocket.)

Last week I concluded that it was time to upgrade. I was going to get the 540 but it just so happened that Garmin had a sale and I could get the 840 for the price of 540. (I suppose I could have just gotten the 540 and saved $100, but I went with DC Rainmaker’s suggestion to get the 840 instead of the 540.)

Backups

For many years now, I’ve been backing up my 500 by mounting it and rsync’ing the contents into a Mercurial repository. The nice thing about this approach is that I could remove files from the Garmin/Activities directory on the device to keep the power-on times more reasonable but still have a copy with everything.

I did this on OpenIndiana, then on Unleashed, and now on FreeBSD. For anyone interested, this is the sequence of steps:

$ cd edge-500-backup
# mount -t msdosfs /dev/da0 /mnt
$ rsync -Pax /mnt/ ./
$ hg add Garmin
$ hg commit -m "Sync device"
# umount /mnt

This approach worked with the 500 and the 520, and it should work with everything except the latest devices—540, 840, and 1050. On those, Garmin switched from USB mass storage to MTP for file transfers.

After playing around a little bit, I came up with the following. It uses a jmtpfs FUSE file system to mount the MTP device, after which I rsync the contents to a Mercurial repo. So, generally the same workflow as before!

$ cd edge-840-backup
# jmtpfs -o allow_other /mnt
$ rsync -Pax \
        --exclude='*.img' \
        --exclude='*.db' \
        --exclude='*.db-journal' \
        /mnt/Internal\ Storage/ edge-840-backup/
$ hg add Garmin
$ hg commit -m "Sync device"
# umount /mnt

I hit a timeout issue when rsync tried to read the big files (*.img with map data, and *.db{,-journal} with various databases, so I just told rsync to ignore them. I haven’t looked at how MTP works or how jmtpfs is implemented, but it has the feel of something trying to read too much data (the whole file?), that taking too long, and the FUSE safety timeouts kicking in. Maybe I’ll look into it some day.

Aside from the timeout when reading large files, this seems to work well on my FreeBSD 14.2 desktop.